First and formost, I would like to clear the air. This is not a set of instructions on how to put Linux on your phone, as you would do with apps like Linux Deploy. This is also not for the faint of heart. This is a step by step tutorial on how to turn your phone FROM Android TO Debian Linux.
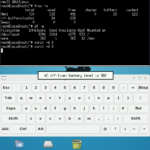
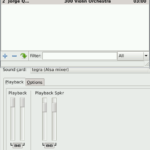
As we saw in my earlier posts, this was successful on a Samsung Captivate Glide (i927), here are some screenshots:
Warning: This will either be successful, or you will never be able to use your phone again. Perhaps there are some happy mediums in between. In either event, please read carefully, and tailor the instructions to your device and needs. These instructions were originally posted by me on this forum at XDA: http://forum.xda-developers.com/showpost.php?p=67713159&postcount=20&nocache=1&z=9396170606494306
In this post, I am trying to assist a user to change my original work, which was for the i927, Samsung Captivate Glide, to his phone, the Samsung Galaxy Core 2 SM-G355HN. Available to him was CM11. So, to follow these instructions on another phone, download the appropriate rom for your phone. The older the rom the better, as they typically have less stringent controls and more available ram.
Okay, so first things first, STEP 1: downloads!
Download these things:
[url]http://www.mediafire.com/download/zl80gh0t310trla/unpack-bootimg.pl[/url]
[url]http://www.mediafire.com/download/xdmd278n17gm58h/unmkbootimg[/url]
[url]http://www.mediafire.com/download/byf0tw4ga2mqtw0/repack-bootimg.pl[/url]
[url]http://www.mediafire.com/download/7cmi548pzetc6c4/mkbootimg[/url]
And download CM11, if you have not already. (Download the rom appropriate for your phone!)
I am using Linux, Ubuntu 14.04. I did this previously from Debian Wheezy, so any Linux should work. You can also use a VM, virtualbox, etc. if you are on a Windows computer.
STEP 2: Unzip!
Go ahead and unzip the CM11 that you downloaded. Preferably in its very own folder. For my work, I made a folder called “playground” in my home directory to play around in. I will reference the “playground” meaning the main folder with everything in it. Now, in the playground, make a new folder called “bootimage”. In the playground folder, copy the boot.img file to the bootimage folder.
STEP 3: Tools setup!
Copy the downloaded above tools into a new folder called “tools” in the playground folder. Open a terminal here and give these files executable permissions and copy them again to the bootimage folder:
[CODE]
$ cd ~/playground/tools
$ chmod 777 ./*
$ cp ./ ../bootimage
[/CODE]
We copy this twice so we have backups of the tools in case we delete them accidentally.
STEP 4: Unpack the boot image!
Open a terminal and go to the bootimage folder, and start typing:
[CODE]
$ cd ~/playground/bootimage
$ ./unmkbootimg ./bootimage
[/CODE]
You will see some output in the terminal that looks *kind of* like this:
[CODE]
$ ./unmkbootimg ./boot.img
unmkbootimg version 1.2 – Mikael Q Kuisma
Kernel size 2992704
Kernel address 0x10008000
Ramdisk size 2196028
Ramdisk address 0x11000000
Secondary size 0
Secondary address 0x10f00000
Kernel tags address 0x10000100
Flash page size 2048
Board name is “”
Command line “”
This image is built using standard mkbootimg
Extracting kernel to file zImage …
Extracting root filesystem to file initramfs.cpio.gz …
All done.
—————
To recompile this image, use:
mkbootimg –kernel zImage –ramdisk initramfs.cpio.gz -o new_boot.img
—————
[/CODE]
Whatever it says, copy and paste it, hand type it, screenshot, whatever it takes, write the output down, because this is the key to re-making your boot image! I recommend that you post the output here on XDA so we can look at it together.
Then, unpack it like so:
[CODE]
$ ./unpack-bootimg.pl ./boot.img
[/CODE]
You should see something *like* this:
[CODE]
$ ./unpack-bootimg.pl ./boot.img
kernel written to ./boot.img-kernel.gz
ramdisk written to ./boot.img-ramdisk.cpio.gz
7607 blocks
extracted ramdisk contents to directory ./boot.img-ramdisk/
[/CODE]
You will now have folders and files to play with. In the next post, we will make our init script and continue on. You are 1/3 of the way there!
Linux – keep it simple.