Parse is a really neat tool for your Android applications, allowing you to have online servers that store game scores, driver id’s, names, logins, you name it! Whatever storage your app needs, you can just about always use parse for the job.
The usual way of getting parse set up in your app used to be downloading the latest parse “starter kit” app. An empty app that has parse libraries and the code needed already built in. But that is a bit of a hassle now, since they have closed down the parse website.
However, as I mentioned before, parse did make all of their material open source as they faded off into the wild blue yonder, but it left newbies like myself struggling to figure out how to implement parse into new apps.
The great news is, you do not need to get a “parse starter kit” or some such app. The pros already had this figured out, but if you are new like me, then here is my take on importing parse into your app in Android Studio (this should work on any Android Studio, but for reference, I used Android Studio 2.3.1).
Step 1. Make a new app, name it whatever you want.
Step 2. From the file menu, click “project structure”.
Step 3. In the window that pops up, under Modules, click “app”.
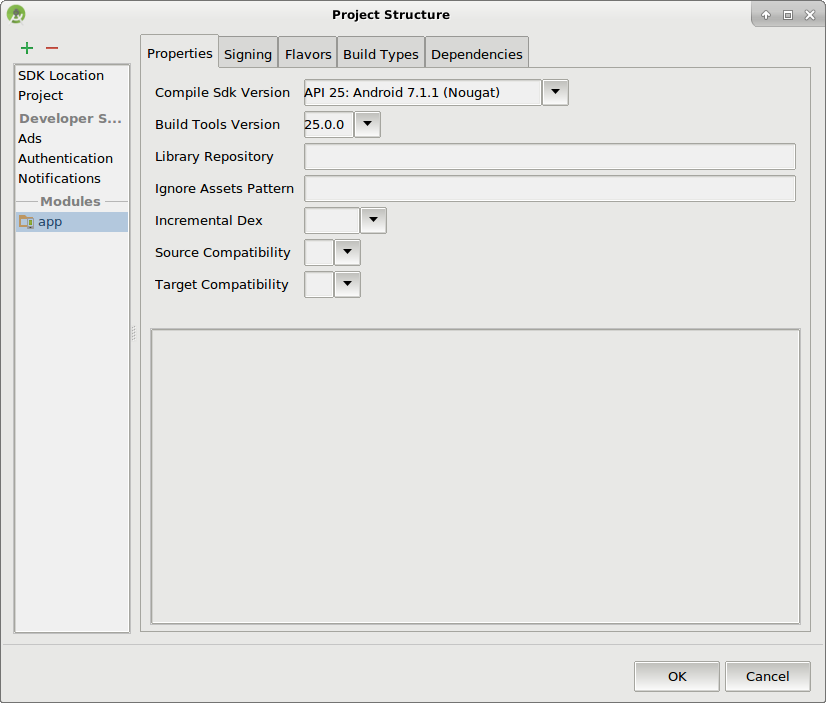
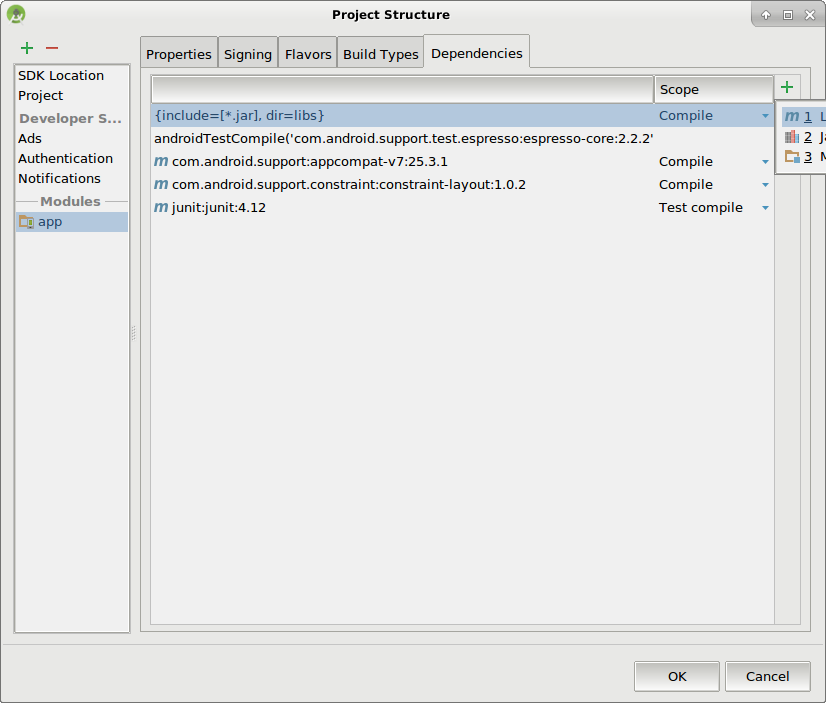
Step 4. Click on the “Dependencies” tab.
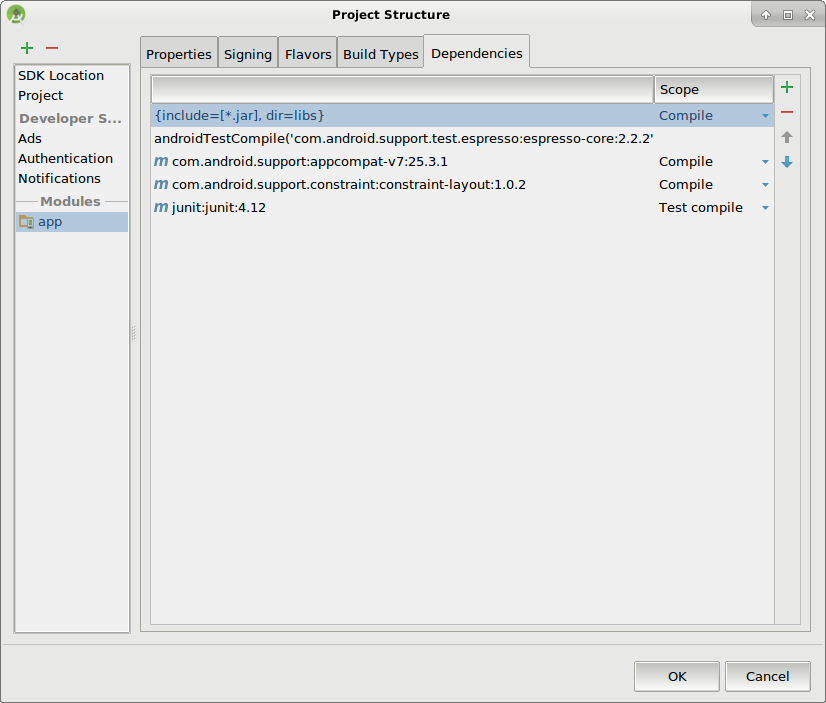
Step 5. Click the green “+” arrow, and choose #1, Library.
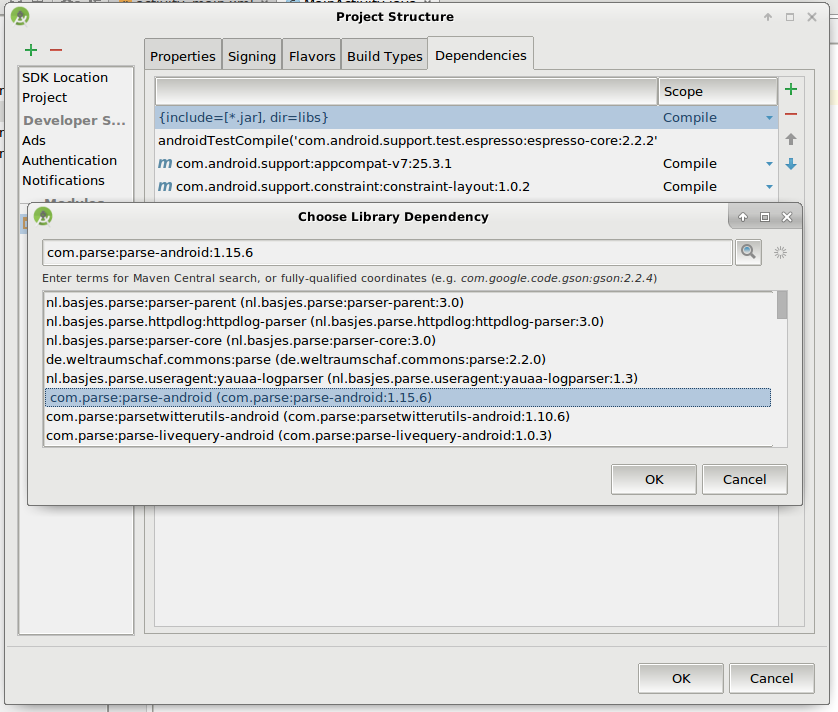
Step 6. When the Library Dependency window opens, type “parse” and press enter. Now choose the latest “com.parse:parse-android XXXXXXXXXX” version, and press OK.
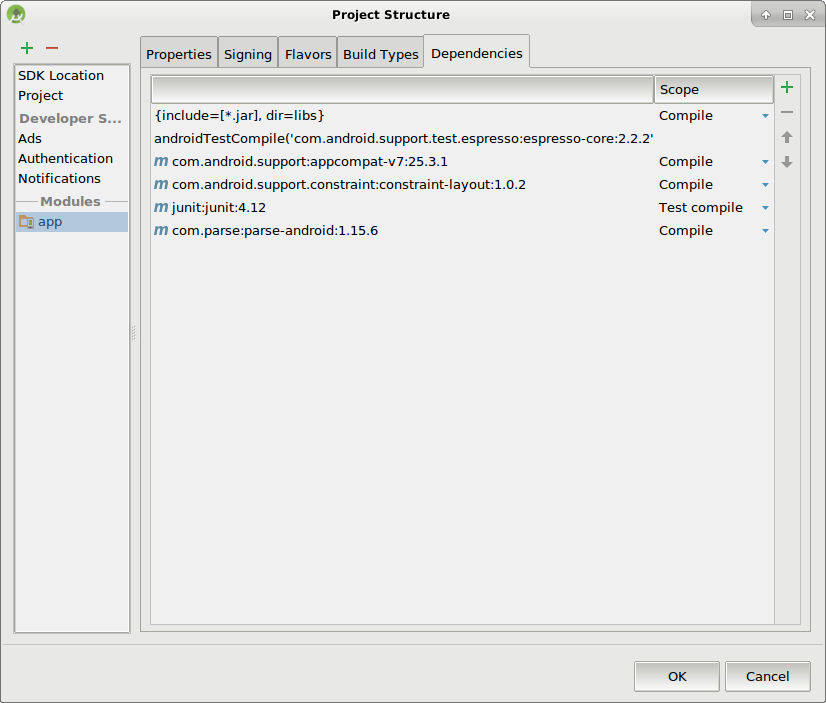
Step 7. You should now be returned to your Dependencies tab, with the parse library added. Press OK to close the window.
Step 8. Add these lines to your MainActivity.java file (Or whatever you chose to call the first launched activity) :
// Enable Local Datastore.
Parse.enableLocalDatastore(this);

// Add your initialization code here
Parse.initialize(new Parse.Configuration.Builder(getApplicationContext())
        .applicationId("ENTERYOURINFOHERE")
        .clientKey("ENTERYOURINFOHERE")
        .server("https://ENTERYOURINFOHERE/parse/")
        .build()
);
I put that data into the “onCreate” method, so it is called as soon as you launch the app. Now you just have to fill it in with your app id, key, and url for your parse server, and you should be good to go! Then you can start adding your parse commands as usual.
I hope that helps some other parse/app making newbie like myself!
Linux – keep it simple.