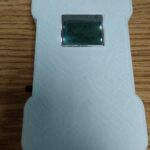
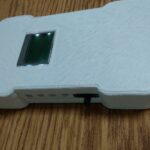
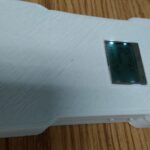
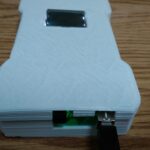
Now that I shoved all the wires in there and soldered in the connections for the buttons, I was able to close the case. It still opens, you just have to unscrew the 4 screws to take it apart.
With that, I’ve also made progress on the button reading and programming. As we saw before, the program uses a “truth table” where based on the math formula of (btn# + screenNumber)*screenNumber = menu option, we can calculate all possible outputs and assign them to operations or values.
So, this is a compilation of four different commits:
You can check out all of the above commits to see the process, but here I’ll cover the main part. This is the button reading function.
int read_LCD_buttons(){               // read the buttons
  adc_key_in = 0;
    //adc_key_in = analogRead(A0);       // read the value from the sensor
    Serial.print("anolog0:"); Serial.println(adc_key_in);
    if (adc_key_in > 550)   return btnRIGHT;
    //adc_key_in = analogRead(A1);       // read the value from the sensor
    Serial.print("anolog1:"); Serial.println(adc_key_in);
    if (adc_key_in > 550)   return btnUP;
    adc_key_in = analogRead(A2);       // read the value from the sensor
    Serial.print("anolog2:"); Serial.println(adc_key_in);
    if (adc_key_in > 550)   return btnDOWN;
    adc_key_in = analogRead(A3);       // read the value from the sensor
    Serial.print("anolog3:"); Serial.println(adc_key_in);
    if (adc_key_in > 550)   return btnLEFT;
    adc_key_in = analogRead(A4);       // read the value from the sensor
    Serial.print("anolog4:"); Serial.println(adc_key_in);
    if (adc_key_in > 550)   return btnSELECT;
    adc_key_in = analogRead(A5);       // read the value from the sensor
    Serial.print("anolog5:"); Serial.println(adc_key_in);
    if (adc_key_in > 550)   return btnBACK;
    return btnNONE;                // when all others fail, return this.
}
At first, I have it log everything to serial so I can see what is happening. Essentially, I took a wire from 3.3vdc that goes to the button. Then the button goes to the analog input, with a jumper going to a resistor to ground. That way, when you are not pushing the button, then the analog pin is not floating, and reads 0. When you push a button, that input reads around 700. So, I put the threshold at greater than 550. This seems to work fairly well.
The only problem is that I didn’t arrange the buttons the way I thought that I was programming them to work. Rather than swap the button wires physically, I just re-ordered them in my program, saying one was two, etc.
Here is the call inside the loop, asking for which button is pressed:
int waiting = 0;
menuNumber = 0;
while ( waiting < 30 ){
waiting++;
delay(10);
lcd_key = read_LCD_buttons(); // read the buttons
// TESTING ONLY // Serial.print(lcd_key);
switch (lcd_key){case btnUP:{
menuNumber = (1+screenNumber)*screenNumber;
break;
}
case btnDOWN:{
menuNumber = (2+screenNumber)*screenNumber;
break;
}
case btnLEFT:{
menuNumber = (3+screenNumber)*screenNumber;
break;
}
case btnRIGHT:{
menuNumber = (4+screenNumber)*screenNumber;
break;
}
case btnSELECT:{
menuNumber = 255;
break;
}
case btnBACK:{
menuNumber = 256;
break;
}
}
// TESTING ONLY // Serial.print(menuNumber);
}
The above call checks every 10 milliseconds to see if you pressed a button. After 30 checks, it continues through the process and refreshes the screens, etc. This works out to be about a half second, due to the length of the program. There is a small window of about a tenth of a second, where pushing a button doesn’t do anything, but I’ve found in test runs that it was really rare that pushing a button didn’t respond immediately.
If you don’t do this, it is refreshing the screen about 30 times a second as it rips through the program, and there is only a fraction of a second where pushing the button actually works. There is probably a better way to do this, but this works really well for my program.
Now I just need to make it send and receive text messages!
Linux – keep it simple.


Hey there, clever thinking on the buttons with the math, but it would be much easier if you simplified it via hardware with wiring like this: https://github.com/zegreatclan/SimHub/issues/237
Basically by wiring them in rows and columns you know the “coordinate” of the button that was pressed.
Great point! Perhaps when I do another project I can utilize something more like that. Also, having a real keypad certainly would improve the experience!