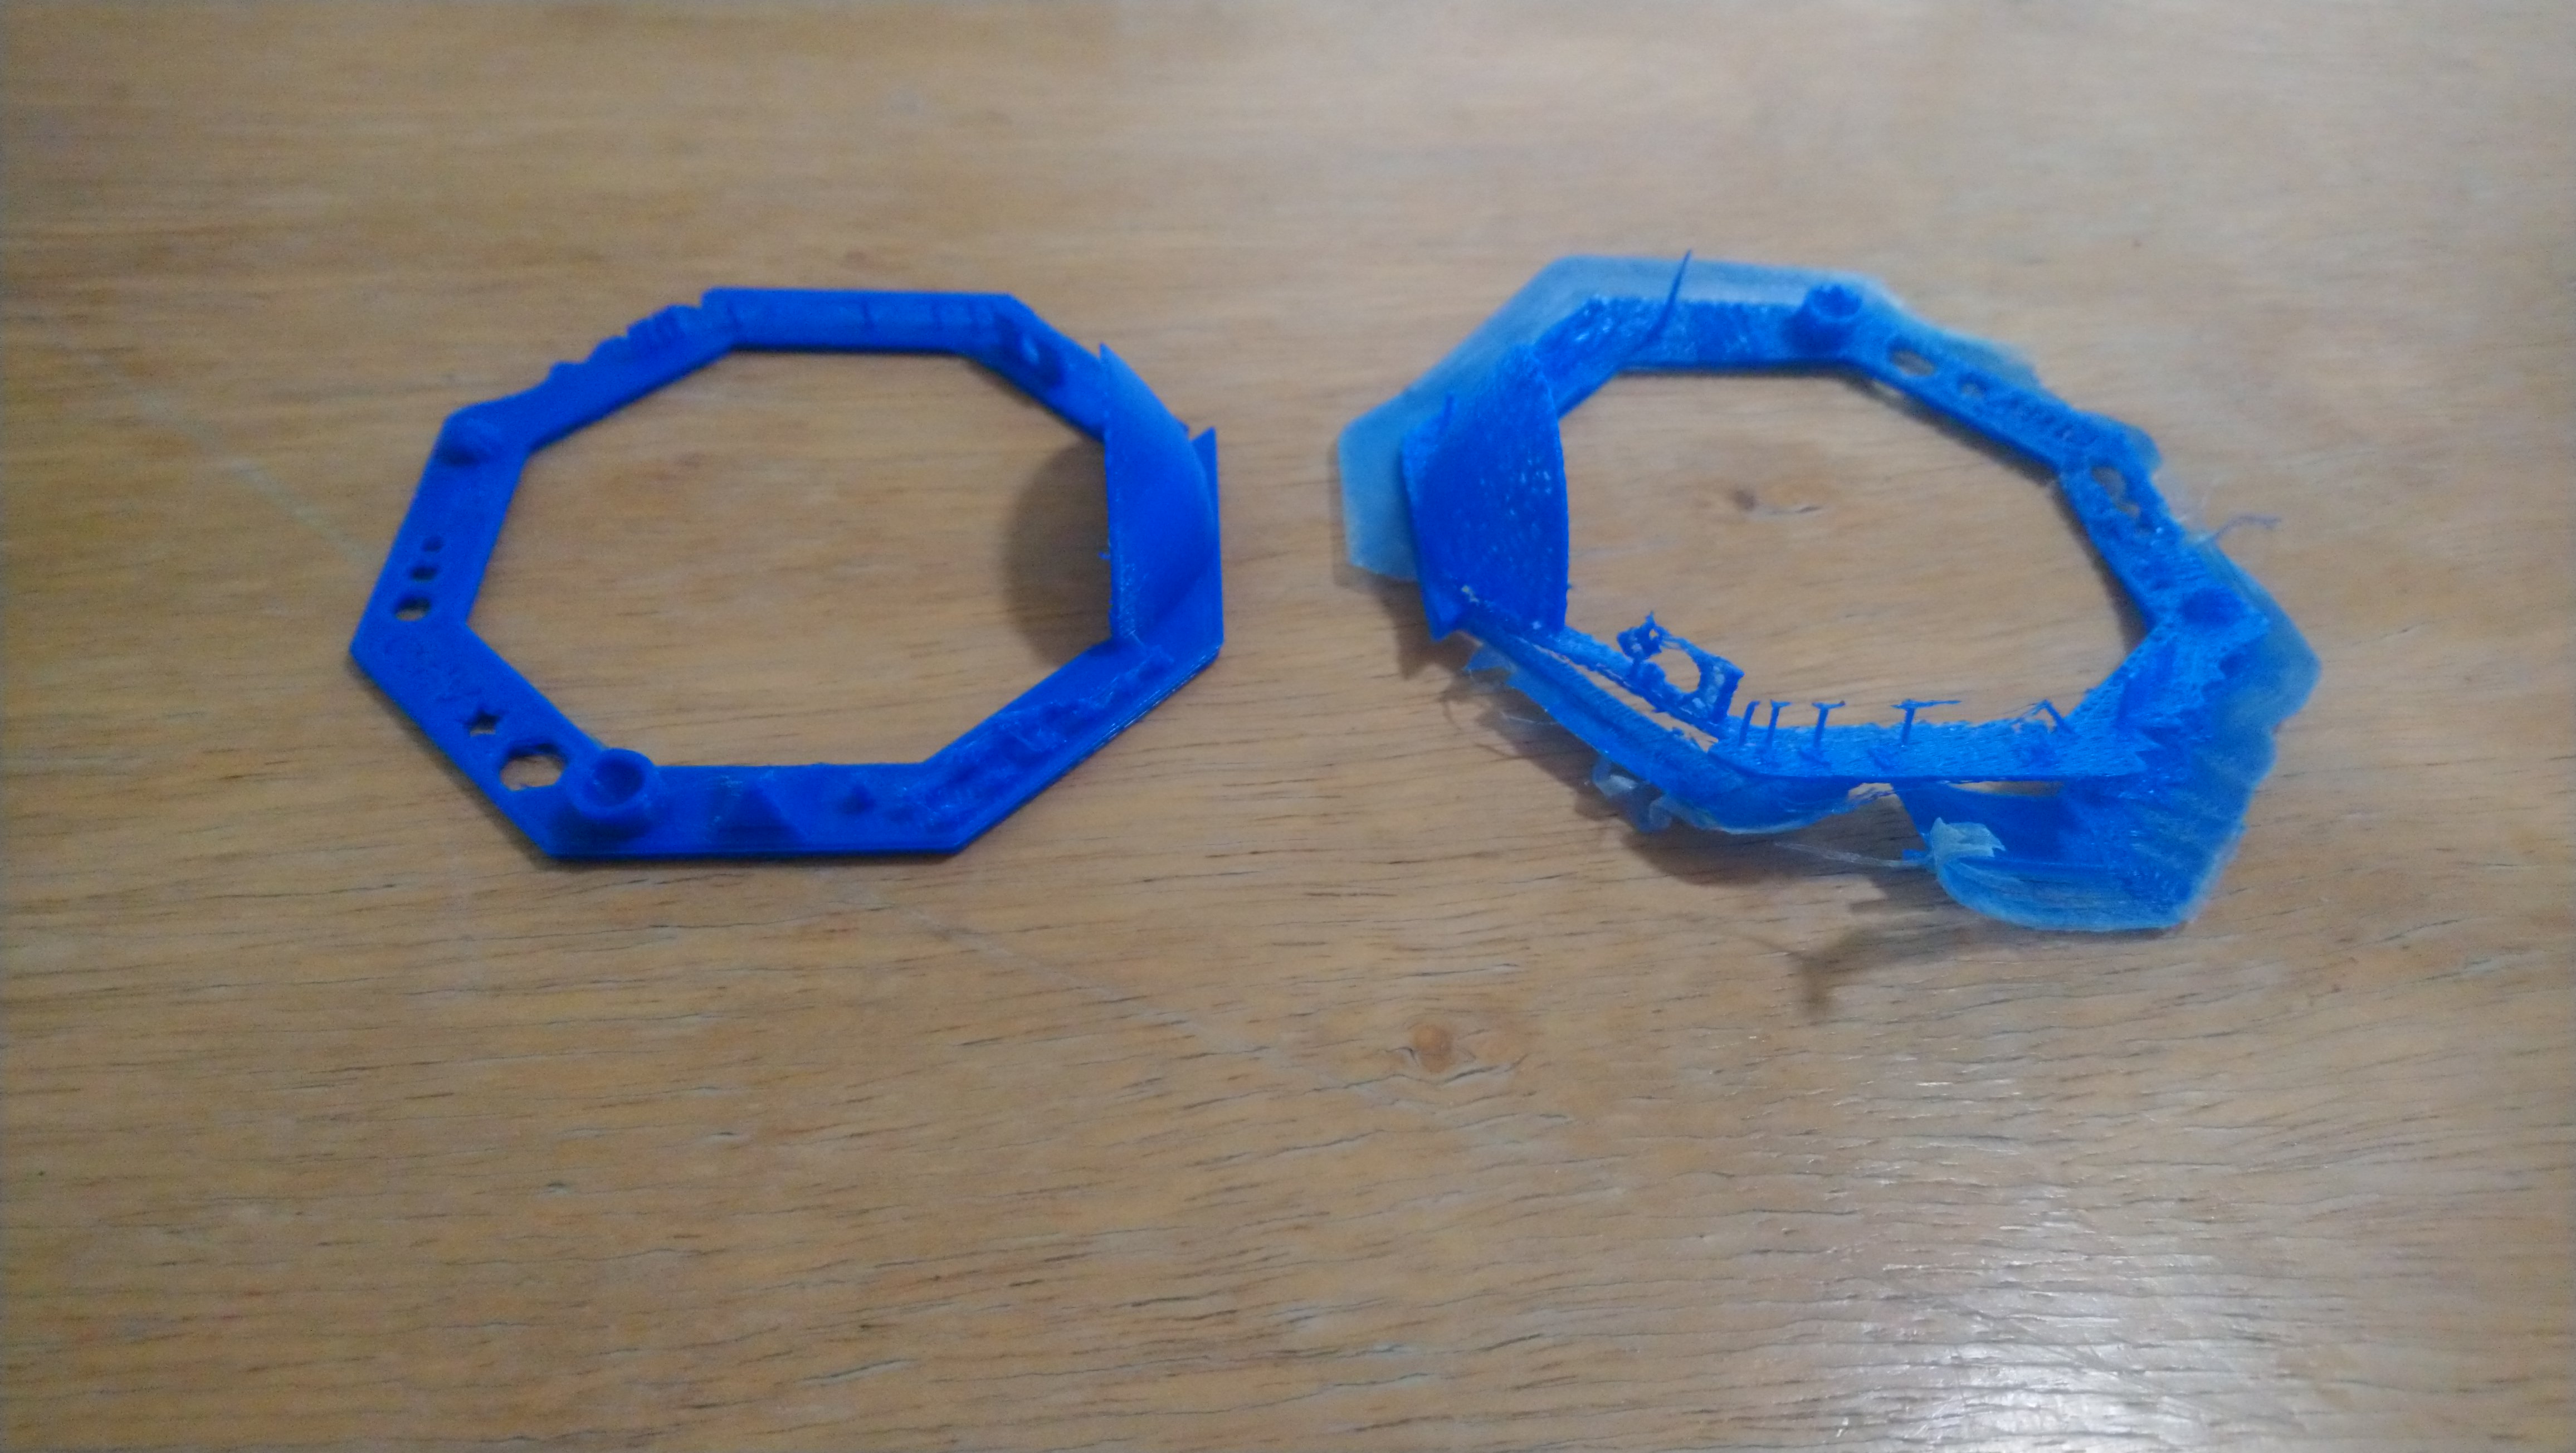
As promissed, I wanted to make a post with my slicer settings that I use for my Colido 3D DIY printer in Slic3r. Why? Because I’m learning that slicer settings matter, big time. If the above picture loaded for you, then you can see that the same 3D model will drastically change when sliced with different slice settings. Warping, crummy prints will plague you if you don’t get this right.
I learned this the hard way, and, after dozens of test prints, I finally found something that prints decent for my modest printer. If any of you happen to have a Colido 3D DIY printer, then maybe this can save you dozens of prints spanning days or weeks of free time. At least, that’s the goal.
Here is my colido3Ddiy.ini file:
# generated by Slic3r 1.2.4 on Wed Jul 17 17:27:12 2019
avoid_crossing_perimeters = 0
bed_shape = 0x0,200×0,200×200,0x200
bed_temperature = 0
bottom_solid_layers = 3
bridge_acceleration = 0
bridge_fan_speed = 100
bridge_flow_ratio = 1
bridge_speed = 60
brim_width = 0
complete_objects = 0
cooling = 1
default_acceleration = 0
disable_fan_first_layers = 1
dont_support_bridges = 1
duplicate_distance = 6
end_gcode = M104 S0 ; turn off temperature\nM140 S0 ; set bed target temp\nG28 X0 ; home X axis\nM84 ; disable motors\nG1 Z169 F200;
external_fill_pattern = rectilinear
external_perimeter_extrusion_width = 0.35
external_perimeter_speed = 70%
external_perimeters_first = 0
extra_perimeters = 1
extruder_clearance_height = 20
extruder_clearance_radius = 20
extruder_offset = 0x0
extrusion_axis = E
extrusion_multiplier = 1
extrusion_width = 0.35
fan_always_on = 0
fan_below_layer_time = 60
filament_diameter = 1.75
fill_angle = 45
fill_density = 30%
fill_pattern = line
first_layer_acceleration = 0
first_layer_bed_temperature = 0
first_layer_extrusion_width = 200%
first_layer_height = 0.32
first_layer_speed = 70%
first_layer_temperature = 195
gap_fill_speed = 20
gcode_arcs = 0
gcode_comments = 0
gcode_flavor = reprap
infill_acceleration = 0
infill_every_layers = 1
infill_extruder = 1
infill_extrusion_width = 0.29
infill_first = 0
infill_only_where_needed = 0
infill_speed = 20
interface_shells = 0
layer_gcode =
layer_height = 0.16
max_fan_speed = 100
min_fan_speed = 35
min_print_speed = 10
min_skirt_length = 0
notes =
nozzle_diameter = 0.4
octoprint_apikey =
octoprint_host =
only_retract_when_crossing_perimeters = 1
ooze_prevention = 0
output_filename_format = [input_filename_base].gcode
overhangs = 1
perimeter_acceleration = 0
perimeter_extruder = 1
perimeter_extrusion_width = 0.21
perimeter_speed = 20
perimeters = 3
post_process =
pressure_advance = 0
raft_layers = 0
resolution = 0
retract_before_travel = 2
retract_layer_change = 1
retract_length = 3
retract_length_toolchange = 10
retract_lift = 0
retract_restart_extra = -0.01
retract_restart_extra_toolchange = 0.5
retract_speed = 40
seam_position = nearest
skirt_distance = 6
skirt_height = 1
skirts = 1
slowdown_below_layer_time = 30
small_perimeter_speed = 30
solid_infill_below_area = 70
solid_infill_every_layers = 100
solid_infill_extruder = 1
solid_infill_extrusion_width = 0.59
solid_infill_speed = 60
spiral_vase = 0
standby_temperature_delta = -5
start_gcode = M104 S195 ; set temperature\nG28 ; home all axes\nG1 Z5 F200 ; lift nozzle\nM109 S195 ; wait for temperature to be reached
support_material = 1
support_material_angle = 0
support_material_enforce_layers = 0
support_material_extruder = 1
support_material_extrusion_width = 0
support_material_interface_extruder = 1
support_material_interface_layers = 3
support_material_interface_spacing = 0
support_material_interface_speed = 100%
support_material_pattern = pillars
support_material_spacing = 2.5
support_material_speed = 60
support_material_threshold = 0
temperature = 195
thin_walls = 1
threads = 2
toolchange_gcode =
top_infill_extrusion_width = 0.2
top_solid_infill_speed = 50
top_solid_layers = 3
travel_speed = 130
use_firmware_retraction = 0
use_relative_e_distances = 0
vibration_limit = 0
wipe = 0
xy_size_compensation = 0
use_volumetric_e = 0
z_offset = 0
before_layer_gcode =
So in these 125 settings are the keys to a successful print on my 3D printer. I’d like to point out just a few things about them though:
- perimeter_speed = 20 ; Going slow on the perimeters really helped define the shape of my prints. It does make it take much longer, since I’ve slowed down all the speeds, but it does make a huge difference on the quality of the finished product.
- layer_height = 0.16 ; Having a finer layer height also drastically improved the print quality.
- infill_speed = 20 ; You could probably make this faster by raising the infill speed, but with my cheap printer, the slower the better. However, most of my prints take hours longer at this speed.
- perimeters = 3 ; Having thicker walls for the edges of things made my prints significantly stronger without having to up the fill density, which I usually keep at 30-40%.
It’s a bit tedious if you are playing with a new to you printer and don’t know where to start. Having 125 settings to work with really makes it a daunting task, considering the best thing to do is to change one setting at a time. Hopefully these settings will help point someone else in the right direction, or at the very least, help another Colido 3D DIY owner.
Linux – keep it simple.