Editors note: In my last post you can see that I received my General class license, and can now transmit on the bands listed in this article. However, this article was written prior to testing for my general class license, and future posts recognize that. I messed up the order of these posts, but wanted to keep them sense I learned a lot in making them.
If you’ve been following along with the blog, you’ll know that I’ve been working on utilizing my old TS-820s for digital modes. It’s been easier said than done, and I’m only about half way there right now, as I only listen, and don’t transmit at present. I believe I physically could, but the bands I’ve been listening on I don’t have permission to transmit on as a technician license holder. Guess I’ll have to step up to a general license to make the most of it.
That said, I’ve been doing a lot of research on how to make this work, and I’ve not gotten a lot of clear instruction for how to do this with an older radio that doesn’t have CAT control. CAT control allows the computer to control the radio frequencies, volumes, etc., so you can control everything from within your preferred program. Instead, I have to manually adjust the radio dials for each setting that I want changed. I’m not yet sure what affect this will have on transmitting (the signalink can key the mic, but for shifting, etc.) but so far it is working fine for receiving.
Online, I found many forums where people would ask if you could use a TS-520 or TS-820 for digital modes. Many people responded about 10 years ago saying that they have done it, but nobody has put up a guide or even any bullet points to go by, so I am kind of shooting in the dark and reasoning everything out on my own. Most groups I try to ask about it tell me to get a newer radio that supports digital or at least CAT controls. They are probably right, but I’d love to keep this old equipment going, and I’d like to save the money of buying a new radio (even though I would love to get my hands on a FT-991A from Yaesu). Also a large part of the hobby, in my opinion, is learning and figuring out ways to do things, so figuring out how to use an old radio that is analog without CAT controls to do digital work seems like a great use of my hobby time.
That said, I’m going to outline what I’m doing to try and help the next guy or gal who might be doing the same thing. I’ll start with the components:
1. TS-820s Transceiver
Any old school transceiver that doesn’t have CAT controls. There are lots of guides for those who have a radio that can be directly controlled, via serial or usb, by the computer. In this setup, I’m specifically working with a radio that was too old for that to be an option.
2. SignaLink USB Device
I bought one from Tigertronics directly, but you can find them from many online stores. You could make one for yourself, but I really like this model from them. It works great and is pretty handy to have a sound card as a USB device, as some of my computers don’t have a sound card, or the settings and sample rates are different. Your mileage may vary, but this works great for me and it can key the microphone when it is time to transmit. The USB cable from the SignaLink needs to be connected to the computer, and the RJ-45 to microphone cable plugged into the radio and SignaLink. I also used the speaker out jack on the back of the TS-820s needs to go to the speaker jack on the SignaLink with a standard 3.5mm jack audio cable.
3. A Computer
In my case, I’m using a desktop with Ubuntu 18.04 installed. Due to that, I have a very important note to make. When I first started out, I installed the Ubuntu repository wsjtx program, and it is version 1.1, or something really old like that. That version doesn’t support FT-8. So, I tried to upgrade to the latest by downloading the DEB file from wstjx’s website, but the latest version 2.4 will not run in Ubuntu 18.04 due to dependency issues.
In the end, I broke even with a guide on LinuxER.eu, which shows how to get up to version 1.9.1, but that still didn’t help, as the way FT-8 is handled in version 1.9.1 is not the way it is handled with newer versions (per an online group I asked for help). Eventually, I found this guide on wsprnet.org, which did help me add a ppa and install version 2.1.0, which worked great. I recommend any which way you can to get the latest version possible.
The Setup:
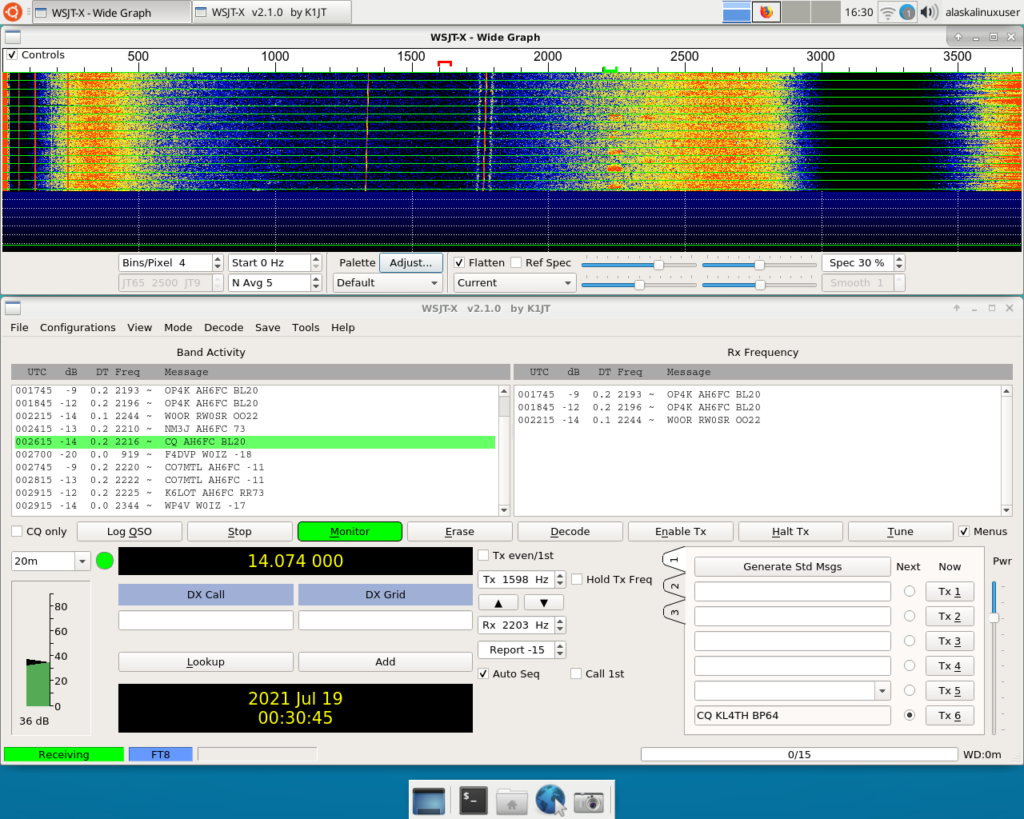
On the computer, open up wsjtx. The first thing you need to do is adjust the waterfall window. If you don’t realize it now, this will really leave you stumped later (if you’re not very bright like me). The window by default only shows 0-1200 Hz, but you should set “bins/pixels” to 5, so you can see the entire 3000 Hz that the signals will be on. Otherwise, when you are looking at the graph, you wont see half of the signals, and that really through me off later on, so I suggest you fix this now.
Next, open File -> settings. On the general tab, enter your call sign and your grid location, which you can look up here on QRZ. I leave the rest as the default. On the radio tab, I choose rig “none” and set ptt method to “VOX”. Technically, since we are using the SignaLink, it is not really VOX, because the SignaLink is going to key it with the microphone input, but that is the setting we need to pick. On the audio tab, select the input and output audio to be the SignaLink USB sound card. And that’s it. The rest of the settings can be left blank or the default. Select okay and close the settings menu.
Now set the Mode menu to FT-8, and set the band to the desired band. For instance 20m or whatever you need. Since there is no CAT control, it will not change the radio’s frequencies, but it will help for logging purposes later. Now, I adjusted the computer’s input and output volume to 16%. Your mileage may vary.
Now, on the SignaLink, I set the power button on, the TX to the fourth notch, RX to the sixth notch, and delay to the lowest notch.
Now comes the fun part. Setting up the radio. I will presume that you know how to setup the radio for a band, such as dipping the plate, setting everything, etc., but I will specifically tell you what settings I am using on mine, just in case you need them. For this example, I am on the 20 meter band.
1. Power on, heater on.
2. Function switch to VFR.
3. Band select to 14.
4. RF ATT switch to off.
5. RIT on and centered (you can use it to fine tune later).
6. Mic/Car you will adjust while transmitting so as to show no ACL on meter, so pretty low, like 3.
7. RF GAIN - Maxed.
8. AF GAIN - 2. (If this is too high, you will get noise. If it is to low, you won't get the signals. Generally, the lower the better for digital.)
9. Drive, above middle for my old tubes - YMMV.
10. Plate, dipped for 14.
11. Load, as low as possible so as not to have any ALC when transmitting.
12. Fixed Channel, Delay, anti-vox, vox gain, all of these are N/A.
13. Compressor level pushed in so it is not active.
14. VFO, to the desired band, in this case 14.074
15. Mode select switch to USB (Upper Side Band).
16. Send/receive to receive.
17. Vox/man to man.
18. NB/off to off.
19. Moni/off to off.
20. Off/fast/slow to slow.
21. Meter to ALC.
With this setup, I then would adjust down the AF GAIN until I started seeing the signals come in. You’ll know because they will start popping up in the band activity window. If you find and click on them in the waterfall window, you will also see them show up in the RX Frequency window. They are the signals that look like this:
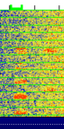
I spent the entire time turning down the AF GAIN until I didn’t overdrive or distort the digital signals. Again, your mileage may vary, but low and slow seems to be the key for digital work over these old analog radios. Once I am able to transmit, I will make another post about that. Until then, I hope this helps other’s who are trying to do something similar to this. Using this setup, in the first 5 minutes I saw traffic from Russia and Hawaii and was able to track their correspondence!
Linux – keep it simple.