In my last post I talked about my attempts at “hacking” into an IPLC-M4-CORD smart cord. Be sure to check out that post to see how I found my way into a telnet based connection on port 80 and what other fun hidden menu options that I found. I had big plans to spend some more time on working this over, but ended up a little too busy to accomplish too much more.
Overall, progress has been slow. I have not found a way to permanently enact any change over the cords default programming at this time. Part of the problem is that experimentation requires a certain amount of risk, and since I don’t own the cord in question, I, and the owner, are a little hesitant to take too great of a risk with a working piece of equipment that costs roughly $80. E.g., it is a bit expensive to replace if we break it.
One of my last experiments with it, by attempting some of the writing functions, left it looking rather brain dead for a few minutes, and we were unsure if it would return to it’s usual state, so we brought the project to a close. However, I’d be glad to show you a few fun things that we did.
First, one of the funnest parts of the project was that of changing the LED color, but we could only affect it briefly, before the usual programing took back the LED to change it to the designed color. Once you are telnet, or nc’d in, just do the following:
%% F 100,0,255
(PINK)
%% F 0,100,255
(CYAN)
%% F 100,255,0
(YELLOW)
Fortunately, the RGB LED colors were simple decimal values and you can look them up in any table online. They accept any value from 0 to 255 for each color, being Red, Green, and Blue in order. If you tried an erroneous number, the LED would flash red momentarily and then go back to it’s usual programming. We were hoping to figure out how to permanently change the default colors from green and yellow (for gas and diesel profiles respectively) to pink and purple for my co-workers wife.
Another feature we put to use was the load command, with the L key:
%% L
ON
%% L
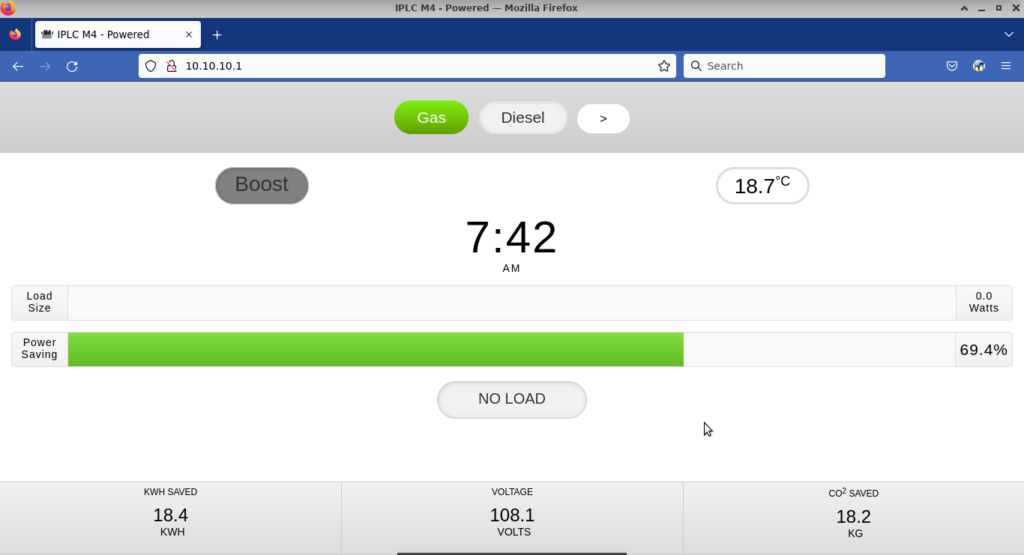
OFFThis command simply turned the power to the load on and off. By itself, this command essentially became the “boost” button that you see in the web gui for controlling the unit.
We also could pull a lot of information from the unit with the sensor information, like the proximity sensor used to tell if you “pushed” the “button” on the unit (it has no button, just detects your close finger and switches profiles), or the accelerator data, ambient temperature, or even the ambient light levels. Most of this could also be summed up in the S command to show status, like so:
%% S
serialnum: 400226
johndra: 10
code version: 000000E8
BOOT version: 00010000
M210 Control: 00 LCA: 00 TIMER: 00 T: A8   20.000°C
CYCLE: C5 ORDER: 00

System Status: 00000000
QSPI MODE: 1 STAIP:

 VS: 0804  0.1005 0804
 VL: 0804  0.1004 0805
 IL: 07E8  0.0244 07E8
 TC: 0000 TCoff: FFFE TCfloat:  0.000°C
 TI: 03E3 TIoff: FFFA TIfloat:  28.300°C
 TA: 05E0 TAoff: FEFE TAccel:  29.867°C
 TCaseOff: -8.000°C

 Supply V:  4.302 Line Freq:  59.977 BREAKS: 0
 Gravimetric X:  0.15 Y:-0.25 Z: 0.93
 Twilight  Ambient lux:  19.6722 CH0:  7.0 CH1:  3.0
 Proximity: 034E trip: 03B7
 VS:  105.784 VL:  30.644 IL:  0.048
 PL:  0.68 QL: -1.33 PF:  1.00
 Tint:  28.31°C TCase:  20.10°C TAmb:  20.10°C
With these combined commands, we actually could control the unit from a computer, able to turn the load on and off at any interval we wanted, check the status of the load, and change colors. Essentially, we had complete control over the currently running instance, and if scripted, as long as you had control from the computer, you could essentially make the unit do whatever you wanted. However, once the computer disconnected, or the cord was unplugged and plugged back in, it returned to it’s pre-programmed default behavior.
Where we got into a spot of trouble was by trying to write offsets and flash calibration info. We could run the command, but there is no explanation stating what info we should put into the command. E.g., write “abc”, but what should we put in there. needless to say, entering sporadic information in an attempt to see what we could accomplish did not yield positive results.
We did find that if you send the R command, the unit would reboot to a special bootloader mode, with a new web gui that allowed you to upload firmware, however, without any knowledge of what the firmware should look like, we couldn’t make much progress with it. It appears to expect a binary file, probably similar to something you would flash to an Arduino type device.
That being said, I think another avenue would be to disassemble the unit and see what chips are inside. This would give us more information to work with and may even lead to the proper programming tools. However, the units are sealed because they go outside, and breaking open an $80 part that works great to play around was not something my co-workers and I were willing to do, since it was pretty obvious that we would likely damage it in the process.
I did reach out to IPLC, the company that made the devices. I told them exactly what I was trying to accomplish and what I had tried thus far. They were very polite, but also very firm that they would not assist me and that my warranty would be void. I certainly can’t blame them, but I was hoping for a little bit of insight. They have other units that they allow you to reprogram locally, to any settings you want, so I thought perhaps they would be a little more open to the idea for this. I also requested if they would program a cord for us that did what we were attempting to do, but they said that they could not do that at this time.
I can’t help but feel a little defeated, to get so “close” as we were “under the skin” so to speak, but couldn’t affect lasting change on the device. But, it was a really fun experience! Who knows, maybe we will come back to it, especially in the summer, when we don’t need it.
Linux – keep it simple.
If it was me id definitely be opening the case physically at this point… who knows, it could BE an Arduino in there! Lol