Hopefully you read the last article I posted about building an Arduino TNC to perform packet email (Winlink) with my Android cellphone and Baofeng handheld radio. If not, I recommend that you check it out so that this post will make more sense.
After completing the hardware section of the TNC, I needed to flash the firmware. I followed this guide:
http://www.mobilinkd.com/2014/09/11/arduino-kiss-tnc/
Which directed me to download this firmware:
https://raw.githubusercontent.com/mobilinkd/tnc1/arduino/images/mobilinkd-473-arduino.hex
Which is part and parcel of this open source repository on Github:
https://github.com/mobilinkd/tnc1/tree/arduino
However, I had a little bit of trouble flashing my Arduino Nano, which was an off brand variant made by Lafvin. The command you were supposed to run to flash it was:
$ avrdude -c arduino -p m328p -P /dev/ttyUSB0 -b 57600 -U mobilinkd-473-arduino.hexBut that didn’t work. I ended up reading about it online and needed to use this command instead:
alaskalinuxuser@alaskalinuxuser-CF-52:~/Downloads$ avrdude -c arduino -p m328p -P /dev/ttyUSB0 -B 10 -U mobilinkd-473-arduino.hex

avrdude: AVR device initialized and ready to accept instructions

Reading | ################################################## | 100% 0.00s

avrdude: Device signature = 0x1e950f (probably m328p)
avrdude: NOTE: "flash" memory has been specified, an erase cycle will be performed
         To disable this feature, specify the -D option.
avrdude: erasing chip
avrdude: reading input file "mobilinkd-473-arduino.hex"
avrdude: input file mobilinkd-473-arduino.hex auto detected as Intel Hex
avrdude: writing flash (13052 bytes):

Writing | ################################################## | 100% 2.15s

avrdude: 13052 bytes of flash written
avrdude: verifying flash memory against mobilinkd-473-arduino.hex:
avrdude: load data flash data from input file mobilinkd-473-arduino.hex:
avrdude: input file mobilinkd-473-arduino.hex auto detected as Intel Hex
avrdude: input file mobilinkd-473-arduino.hex contains 13052 bytes
avrdude: reading on-chip flash data:

Reading | ################################################## | 100% 1.68s

avrdude: verifying ...
avrdude: 13052 bytes of flash verified

avrdude: safemode: Fuses OK (E:00, H:00, L:00)

avrdude done.  Thank you.

alaskalinuxuser@alaskalinuxuser-CF-52:~/Downloads$
I like to reference where I learned that, but I can’t find the article I read anymore that originally brought me to that conclusion. Either way, that command works for me with the “-B 10” option instead of specifying a baud rate.
Using an OTG cable, I connected my newly flashed TNC to my Android phone. I already had WoAD installed, an app that allows you to send and receive Winlink email, and even though the app was closed, it immediately detected that I had plugged in the TNC, prompting me to open WoAD.
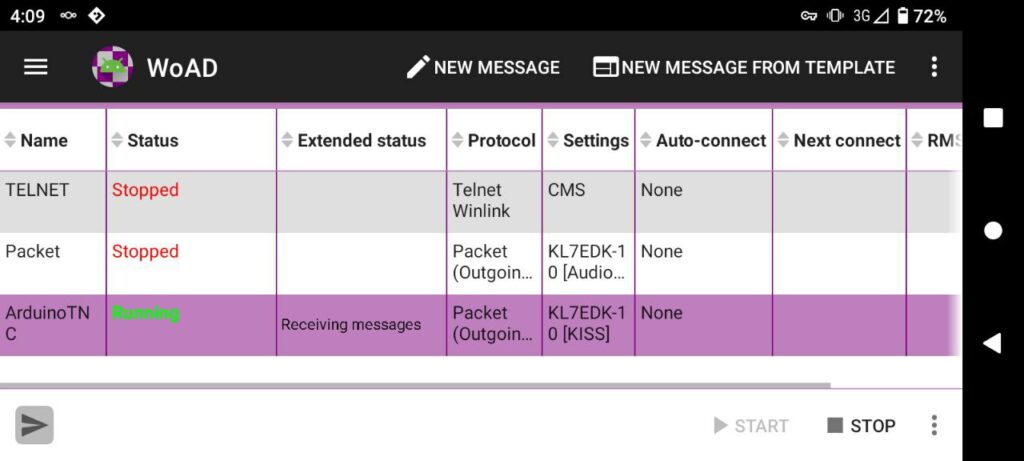
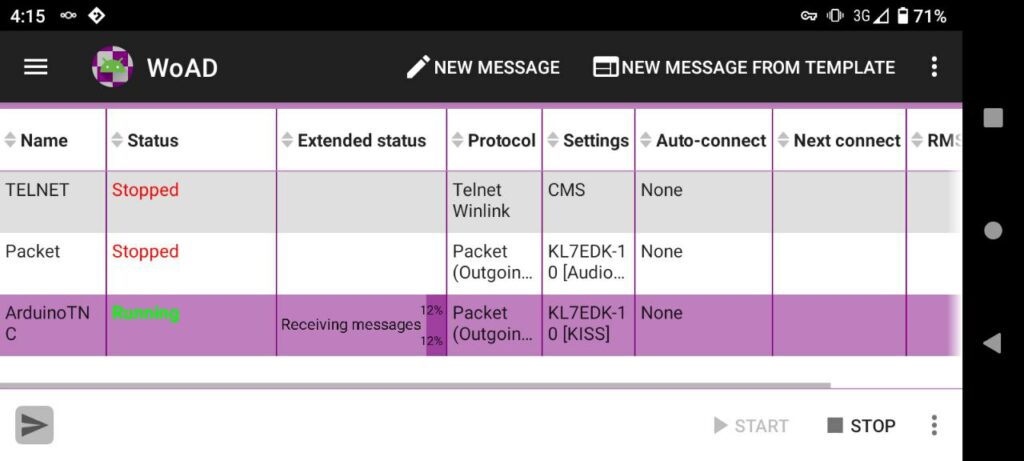
Once WoAD was open, I clicked on the menu option, selected sessions, and clicked the “Add” button to create a new session.
Name: ArduinoTNC
Protocol: Packet
Type: Outgoing
Auto-connect: None
Notes: (I left blank)
Settings ->
Destination address: KL7EDK-10 ( a local station I connect with )
TNC type: KISS
TNC Settings ->
Over-the-air data rate (baud) : 1200
Tx delay (ms) : 500
Maximum packet length : 128
Max outstanding frames : 4
Frack time (sec) : 4
Persistence : 64
Slot time (ms) : 300
Max retries : 10
Tx tail (ms) : 20
TNC configuration ->
Connection type: USB
Connection configuration: (When you click on this, choose your TNC USB port, it only shows one for me, since only one USB device is connected.)
Device manufacturer: Generic
Kiss Port number: 0
And that’s it! I will note that in the previous post I talked about my big slow relay causing a problem. Typically, your Tx delay is shorter, like 300 ms, but with that relay being extra slow, I had to increase the Tx delay to 500 ms. Essentially, this means that it keys the push to talk switch, then waits 500 milliseconds before transmitting the data. This ensures that the relay had time to switch before sending the data.
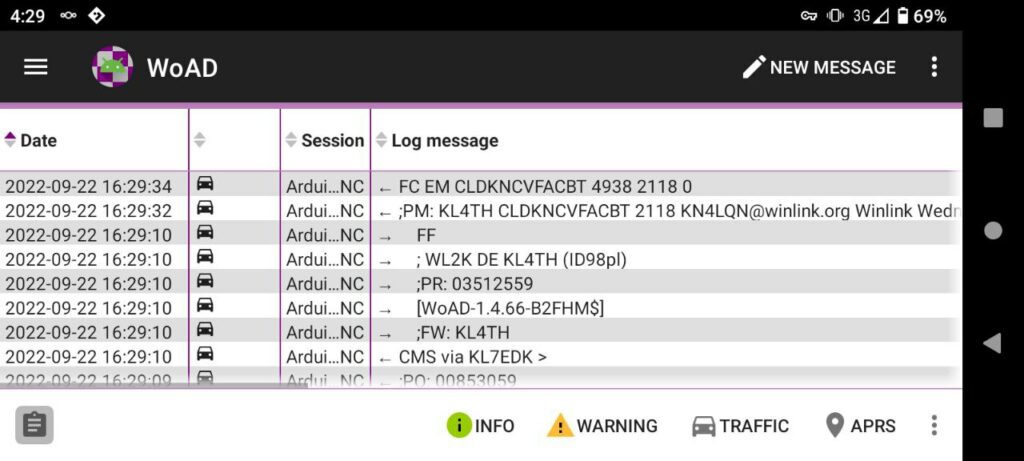
That said and done, I was able to connect to a local Winlink gateway station and, as you can see in the pics, send and receive email. I did notice however, that with larger emails, the TNC would stop sending/receiving. What I don’t know for sure, is if it is my Baofeng radio or the TNC that causes the failure. You see, my Baofeng battery failed, so I “replaced” it with a 9 volt battery, as you can see and read about in my previous posts. However, a drawback to the 9 volt battery is transmitting power is severely limited compared to a standard battery. So I don’t know if the longer transmit times of bigger emails starts to “hammer” the battery until it doesn’t work (plausible, since the battery meter drops to 0 bars when transmitting), or if the TNC gets choked up on larger buffered information.
One way to test would be to get really close to the gateway station, so that if my transmit power is limited, it will still be enough to key the gateway. Or, perhaps I can borrow someone else’s handheld radio to test with. I could also hot wire a plug for my HTX-212 transceiver in the truck, it has 45 watts of output power, so I’m pretty sure that would rule out anything related to power of transmission. Some more testing is in the foreseeable future.
Either way, it’s been a fun project!
Linux – keep it simple.
Oh good! Someone I know thats familiar with avrdude!
Getting ready to use that to flash software to a flashlight soon.
😀
The radio stuff is also fascinating to me, if not a bit over my head… But I must admit finding your posts much easier to follow lately, since I’ve been more into MC programming, and 3d printing.
Yeah, avrdude can be tricky sometimes!